

Can a Kinked Gold Chain Be Fixed? Your Repair Guide
Most minor kinks and tangles in a gold chain can be safely straightened at home with a few household tools and a light touch. Crushed, cracked, or severely bent links, though, usually need a bench jeweler, not a needle and some patience. The type of damage decides everything here, so look closely before you touch anything.
Do this: work the chain on a soft cloth, use fine pins to tease knots apart, and apply a little lubricant to reduce friction. Don’t do this: yank on a snag, apply heat, or force links apart with your fingers, since that stretches and thins the metal. If the chain is solid gold, holds sentimental value, or shows any sign of cracking, a professional repair like the ones detailed by Baker Gold Chains and other jewelers is the safer route. Otherwise, the step-by-step DIY method below will get most everyday kinks out in under twenty minutes.
Pro Tip: Photograph the kink before you start. If your fix doesn’t hold, that photo helps a jeweler quote the repair without guessing what the chain looked like beforehand.
Key Takeaways
Most minor gold chain kinks respond to gentle DIY unkinking with pins, lubricant, and smooth-jaw pliers, while cracked or crushed links call for professional soldering or replacement.
| Point | Details |
|---|---|
| Verdict comes first | Inspect the kink closely before deciding between a home fix and a jeweler visit. |
| Chain style matters | Herringbone and snake chains kink easily and rarely tolerate manual reshaping. |
| Twist, don’t pull | Use sideways twisting motions with smooth-jaw pliers to reshape links safely. |
| Watch for hidden damage | Micro-cracks from a bad DIY attempt can cause a chain to snap weeks later. |
| Replacement is sometimes smarter | Baker Gold Chains offers sturdier chain styles backed by a lifetime guarantee when repair isn’t cost-effective. |
Table of Contents
- Why Gold Chains Kink in the First Place
- How Do You Know If a Kink Can Be Fixed at Home?
- What Tools Do You Need for DIY Chain Repair?
- Step-by-Step: How to Fix Kinks in a Chain at Home
- What Do Professional Jewelers Do to Fix Severe Kinks?
- When Should You Stop DIY and See a Jeweler?
- How Can You Prevent Kinks From Happening Again?
- How Much Does Gold Chain Repair Cost?
- When Replacement Beats Repair
- Sources
Why Gold Chains Kink in the First Place
Kinks happen for mechanical reasons: chains tangle in storage, snag on clothing or zippers, or take repeated friction against skin and fabric until a link fatigues and folds. None of that is a manufacturing flaw. It’s just physics acting on thin metal that gets worn every day. Common causes of chain damage include weak or worn links, accidental tugging, and poor storage that lets chains tangle overnight, all of which shape both the repair method and its cost.
Some chain styles are simply more prone to kinking than others, as seen in examples like the Gold Tassel Necklace with Mesh Chain – JV London, which showcase specific chain styles and care.
- High-risk styles: herringbone, snake, and delicate box or cable chains, because their flat or tightly linked construction has almost no give.
- More resilient styles: curb, Cuban, and mariner chains, which use thicker, rounder links that resist folding under normal wear.
Karat and construction matter too. Higher-karat gold (18K, for instance) is softer and bends more easily than 10K or 14K, while gold-plated or gold-filled chains often aren’t worth soldering at all. A kink in a curb chain might pop out with gentle finger pressure. That same kink in a herringbone chain can crease the metal permanently, because there’s no room for the link to flex back into shape.
How Do You Know If a Kink Can Be Fixed at Home?
Before attempting any repair, give the damage a real inspection under good light. A quick five-minute check saves you from making a bad kink worse.
- Examine the kink under bright, direct light, ideally with a jeweler’s loupe or a magnifying glass.
- Run your fingertip gently along the chain to feel for roughness, sharp edges, or misalignment between links.
- Check the links on either side of the kink for thinning or stretching, since fatigue often spreads beyond the visible bend.
- Take close-up photos from at least three angles for your own reference and to send a jeweler if you need an estimate.
Pro Tip: Photograph the chain against a plain white background. The contrast makes hairline cracks and flattened spots far easier to spot than on a patterned countertop or your palm.
Stop immediately and consult a professional if you see any visible cracks, a link that looks flattened or crushed rather than just bent, a hairline fracture, or a missing fragment of metal. Jewelers also point out that a fix which looks successful can still hide micro-cracks or metal fatigue invisible to the naked eye, which is the real risk behind DIY straightening on a chain that’s already stressed.
What Tools Do You Need for DIY Chain Repair?
The right tools make the difference between smoothing out a kink and grinding a scratch into soft gold. Keep the list short and gentle:
- A soft, lint-free cloth or towel to work on (a folded microfiber cloth works well).
- Two fine sewing pins or a thin needle for teasing apart tangles.
- Smooth-jaw tweezers for lifting and positioning small links.
- Jeweler’s needle-nose pliers with smooth, non-serrated jaws.
- A magnifier or loupe to check your progress as you go.
- Baby oil or a drop of mild dish soap in water, used as lubricant.
- A dry microfiber cloth for cleanup afterward.
Skip vise grips, standard hardware-store pliers with textured jaws, open flames, or any adhesive solvent. Serrated pliers dent soft gold on contact, and heat without proper technique warps a chain instead of fixing it. It’s worth spending a little more on a genuine jeweler’s loupe and a pair of smooth-jaw pliers. The cheap toothed versions from a hardware store will scratch and permanently deform delicate links in seconds.
Step-by-Step: How to Fix Kinks in a Chain at Home
Work slowly here. Rushing is the single biggest reason a simple kink turns into a repair bill.
- Clean the chain first. Soak it briefly in warm water with a drop of mild dish soap, rinse, and pat dry with a soft cloth. Dirt and oxidation hide small cracks and make the metal harder to inspect.
- Lay the chain flat on your soft cloth. Position the kinked section under good light where you can see the full length of the tangle or bend.
- Add a drop of lubricant. A little baby oil or soapy water reduces friction as you work the links apart, which lowers the force needed and cuts the risk of stretching them.
- Tease knots apart with two pins. Slide one pin into the loosest part of the tangle and use the second to gently walk the loop free. Never pull the ends of the chain to “shake out” a knot. That tightens it.
- Massage simple kinks with your fingers. For a soft bend in a sturdier chain like a curb or Cuban link, gentle finger pressure alone often reshapes it.
- Re-round bent links with smooth-jaw pliers. Grip the link and use a sideways twisting motion, not a pulling one, to ease it back into shape. Twisting sideways preserves the link’s round cross-section, while pulling stretches and thins the metal, setting up a future break.
- Use a jump ring only as a temporary bridge. If a link separates during the process, a small jump ring can hold the chain together short-term, but it’s not a permanent fix for fine gold chains.
Stop at any point if the metal resists movement, if you hear or feel a link crack, or if you’re working on a fine herringbone or snake chain. Those styles have almost no tolerance for manual reshaping, and forcing them tends to crease the metal permanently rather than smooth it out.
Once the kink is out, clean the chain again with mild soap and water, dry it fully with a microfiber cloth, and test it by laying it flat and letting it hang naturally to check the repair holds. Watch it over your next few wears. If a spot feels rough, looks discolored, or the chain seems to catch at the same point repeatedly, that’s a sign of a micro-crack forming, and it’s time to see a jeweler rather than try again.
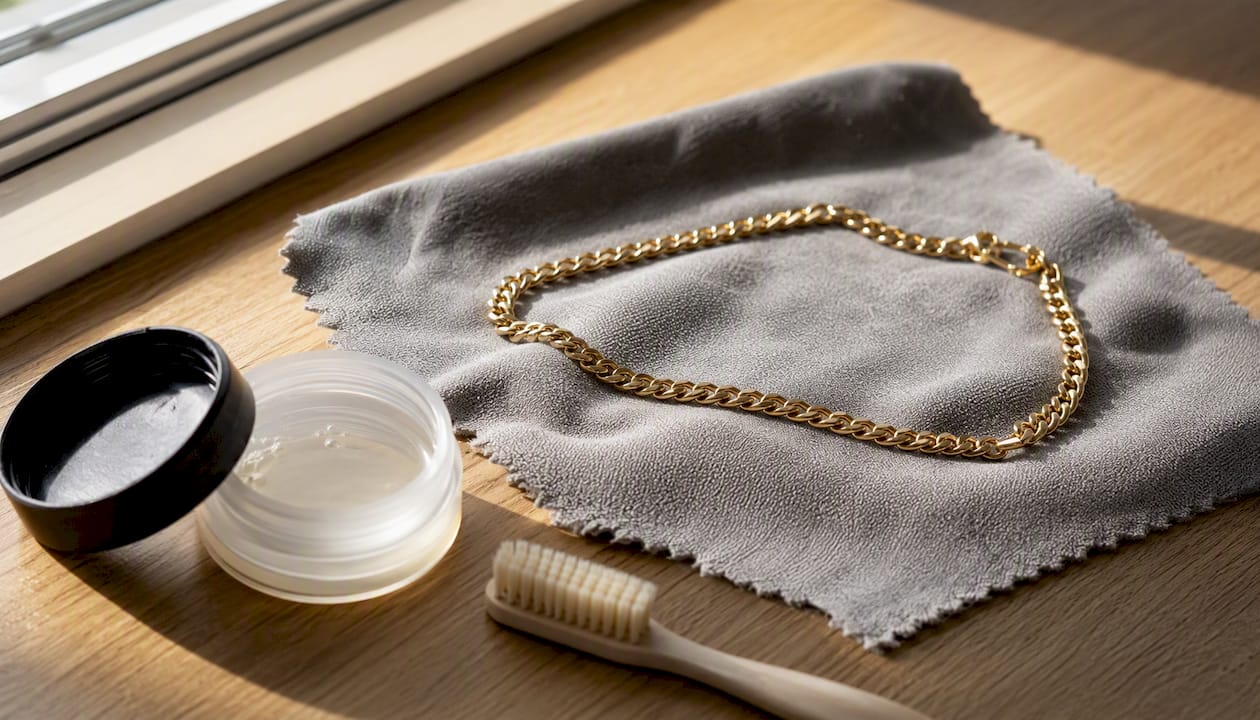
Pro Tip: Work over a white towel or cloth, not a dark surface. Small gold filings or a hairline crack show up immediately against white, and you won’t lose a tiny jump ring in the process.
What Do Professional Jewelers Do to Fix Severe Kinks?
When a kink is beyond safe straightening, a bench jeweler typically follows a set process rather than improvising:
- Assess the damage under magnification to determine whether the section can be saved or needs to be cut out entirely.
- Cut out the damaged section if links are crushed, cracked, or permanently deformed.
- Splice in a matching piece of chain cut to the same link size and karat, so the repair blends visually.
- Solder the joins using a solder alloy matched to the chain’s karat, applying tiny amounts of solder precisely with a soldering cone technique that controls heat so nearby links don’t overheat.
- Pickle and polish the finished joins to remove oxidation and restore shine.
For any true break in a gold chain, professional soldering with matching-karat solder is what actually restores structural strength, not surface-level bending.
Pro Tip: A jeweler will clean a fresh solder join with pickle solution immediately after heating. Skipping that step at home is exactly why DIY soldering attempts on gold usually leave a weak, discolored join.
Home soldering on gold is risky for a reason: the wrong torch heat, mismatched solder, or no pickling step at all can leave a join that looks fine but fails within weeks. That’s why professionals handle precious metal soldering rather than a home butane torch. For crushed kinks on snake or box chains especially, replacing the damaged section is usually the standard fix, since those styles rarely straighten cleanly by hand.
When Should You Stop DIY and See a Jeweler?
Some situations call for professional repair from the start, no matter how confident you feel with the pins and pliers.
- Any visible crack, hairline fracture, or a link that looks flattened rather than bent.
- A missing fragment of metal or a link that’s separated entirely.
- High sentimental or monetary value, where a failed DIY attempt would be costly in more ways than one.
- Delicate constructions like herringbone or snake chains, which don’t tolerate manual reshaping well.
- Your own DIY attempt already failed once. A second try rarely goes better.
Before you hand it off, photograph the damage, note the karat stamp and any hallmarks, and write down any prior repairs the chain has had. Ship it in a padded box with insured shipping, and ask for a written estimate that includes turnaround time before you commit.
How Can You Prevent Kinks From Happening Again?
Prevention costs nothing and saves you the repair bill entirely. Store chains flat or hung individually rather than piled in one drawer, and keep each piece in its own compartment or pouch so clasps and links can’t tangle overnight.
Small jewelry pouches work well for travel, flat velvet-lined drawer inserts suit a home collection, and a necklace stand is worth it if you rotate several chains during the week. Delicate herringbone or snake styles do best in a pouch or lying flat, since hanging them can cause new bends from their own weight. For readers who wear multiple pieces together, our guide on layering necklaces without tangling covers the wearing side of prevention.
Remove chains before sleeping or exercising, and avoid spraying perfume directly onto the metal. If you’re active daily, a heavier link style like mariner chain holds up better than something delicate reserved for occasional wear.
How Much Does Gold Chain Repair Cost?
Repair costs scale with how much work the fix actually requires. A simple jump-ring fix or minor link resizing tends to sit at the low end of jewelry repair pricing, while soldering a single broken or badly kinked link costs more because it involves torch work, matching solder, and finishing. Clasp replacement and full section replacement, where a damaged run of chain is cut out and spliced, land at the higher end, especially with rush service added.
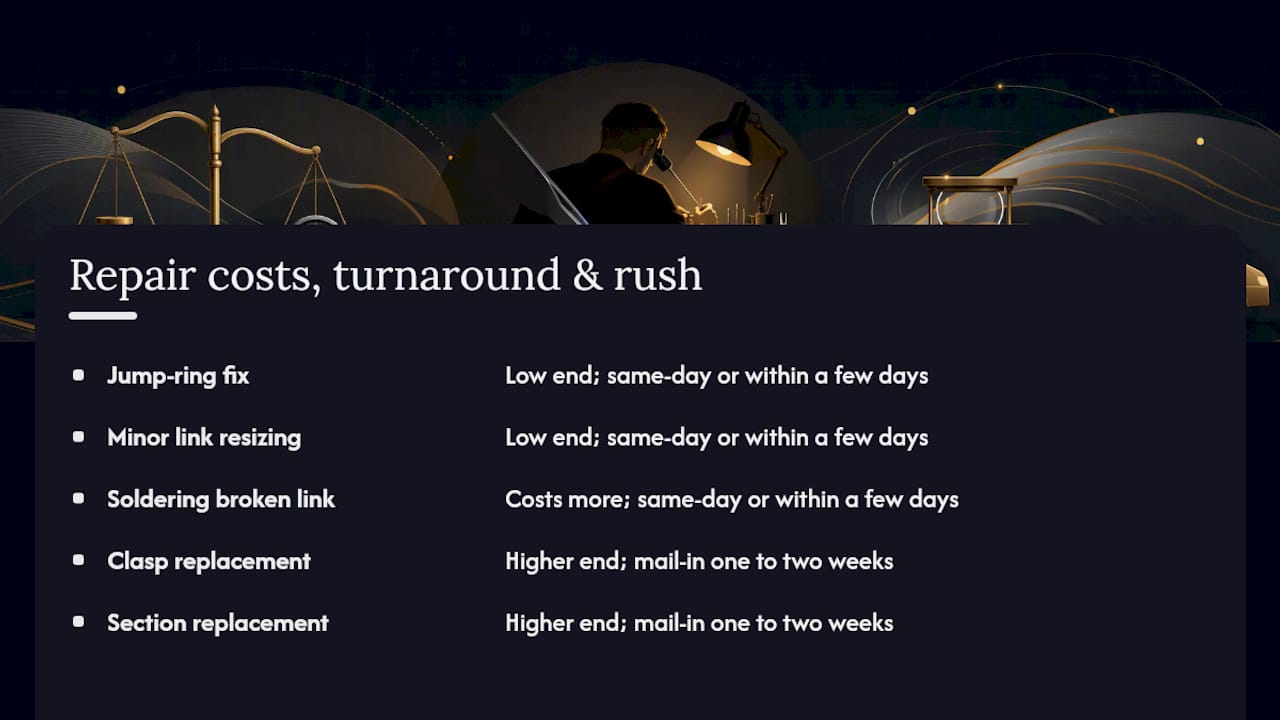
Turnaround also varies. A local jeweler with an in-house bench can often turn around a simple solder repair same-day or within a few days, while mail-in repair services typically take one to two weeks unless you pay for rush processing. Whatever route you choose, ask for a written quote listing the metal karat, labor charge, any material replacement, and polishing fees separately, so you know exactly what you’re paying for.
An Editor’s Take on DIY Versus the Bench
My own rule of thumb: unkink the easy stuff yourself, but the moment a piece has sentimental weight or shows any crack, it goes to a bench jeweler, no exceptions. Confidence with pliers is good. Knowing your limit is better.
When Replacement Beats Repair
Sometimes the honest answer isn’t repair at all. A thin gold-plated chain with a crushed kink often costs more to solder than to simply replace, and severely damaged snake or herringbone styles rarely come back looking the way they did new. If you’ve read through the checklist above and your chain is landing in “replace” territory, Baker Gold Chains carries solid gold pieces built to hold up to daily wear far better than delicate, easily kinked styles.
Every piece comes backed by a lifetime craftsmanship guarantee and free insured shipping on qualifying orders, so a replacement purchase isn’t a gamble the way a rushed repair can be. If you’re replacing a chain that kinked easily, match the weight and karat to what you’re used to wearing. A graduated bead necklace in 14K yellow gold offers sturdier construction than the fine styles most prone to kinking in the first place. Browse the current collection and find a chain built to outlast the one you just repaired, or decided to retire.
Sources
- How to Fix a Broken Necklace Chain: Complete Repair Guide • QJR
- Bench tip: repair fine chain with soldering technique • GIA
- How to Repair Gold Chain Necklace | 7 Easy Steps (2026)
If your chain style isn’t covered here, or the damage looks unusual, a local bench jeweler can examine it in person and tell you exactly what’s repairable.
Recommended
- How to Choose the Right Gold Chain | Complete Buyer’s Guide – Baker Gold Chains
- How to Tell if a Gold Chain Is Real | Real vs Fake Gold Guide – Baker Gold Chains
- How to Clean Gold Chains and Keep Them Shining – Baker Gold Chains
- Avoid these common gold chain mistakes for lasting shine – Baker Gold Chains

