

How to Photograph Your Gold Jewelry Collection at Home
Photographing a gold jewelry collection well comes down to one recipe: soft, high-CRI light (95 or higher), a tripod, a macro-capable lens or smartphone macro mode, and a custom white balance or RAW file. Add a clean, neutral background and you’ve solved the two problems that ruin most gold photos: color that looks off and reflections that hide detail. Collectors reach for these four elements because gold behaves like a mirror. It reflects whatever is around it, including bad light and clutter, so controlling the environment matters more than owning expensive gear.
Before you shoot a single piece, run through this:
- Clean the piece with a lint-free cloth (fingerprints show up at 100% zoom).
- Secure loose stones or delicate clasps with museum wax so nothing shifts mid-shoot.
- Set up on a tripod. Handheld macro shots blur more often than you’d expect.
- Use a high-quality light source with a high Color Rendering Index (CRI) for accurate color, and bounce it off a white or neutral card rather than pointing it straight at the metal.
- Set your camera to f/8 to f/16, ISO 100 to 200, and shoot in RAW format or set a custom white balance using a gray card.
- Lay down a clean, matte, neutral background with no texture that competes with the piece.
That’s the entire technical foundation. Everything below explains why each piece matters and how to execute it without spending a fortune.
Key Takeaways
Accurate gold jewelry photography for personal collections depends on CRI 95+ lighting, a tripod, correct white balance, and a documented shot list covering hallmarks and scale.
| Point | Details |
|---|---|
| Light quality first | Use a CRI 95 or higher light source to keep gold tones accurate and avoid muddy color casts. |
| Lock your camera down | Shoot at f/8 to f/16, ISO 100 to 200, on a tripod, in RAW format whenever possible. |
| Document hallmarks | Capture karat stamps and serials at full zoom using macro mode and museum wax for stability. |
| Back up everything | Store original RAW files in two locations and pair them with appraisal paperwork. |
| Match your records to Bakergoldchains | Bakergoldchains’s certified, guaranteed pieces give you a documentation baseline to photograph against from the day you buy. |
Table of Contents
- Gear and budget for photographing gold jewelry collections at home
- How do you light gold jewelry without harsh reflections?
- What camera settings work best for gold jewelry close-ups?
- How do you document hallmarks and pieces for insurance records?
- Choosing backgrounds and composition that flatter gold
- Editing gold jewelry photos without losing accuracy
- Fixing the most common gold photography mistakes
- A one-hour workflow for photographing a small gold collection
- Why accurate photos matter more than collectors realize
- What most guides get wrong about photographing gold at home
- Keep your photos and your collection records in one place
- Sources
Gear and budget for photographing gold jewelry collections at home
You don’t need a studio to get insurance-grade photos. You need the right three or four items, chosen for what they actually fix.
At the basic tier, a smartphone with a clip-on macro lens (roughly $15 to $40) and a simple foam or fabric diffuser gets you sharp, reasonably accurate images. This works because modern phone cameras are capable once you use macro mode on the primary lens rather than the ultrawide, which distorts proportions on close-up shots.
At the mid tier, a 12 to 16 inch light box with a built-in LED rated CRI near 90 to 95, a compact tripod, and an 18% gray card cover most collectors’ needs, from rings to bracelets. At the top tier for a home setup, a dedicated macro lens and a larger light box sized for longer necklaces and chains, and adjustable LED panels rated CRI 95 or above give you the most control over both color and depth of field.
| Tier | Core gear | Best for |
|---|---|---|
| Basic | Smartphone + clip-on macro + foam diffuser | Rings, earrings, quick social shots |
| Mid | 12–16" light box (CRI 90–95), tripod, gray card | Most home collectors, general cataloging |
| Pro home | Macro lens, 24 inch light box, adjustable CRI 95+ LEDs | Necklaces, appraisal-grade documentation |
When you shop for lights, check three specs before anything else: the CRI rating, whether color temperature is adjustable, and whether the LED is flicker-free (cheap LEDs can introduce banding in video and even stills at certain shutter speeds). A 12–16 inch light box handles rings, earrings, and bracelets, while a 24 inch box is worth the upgrade if you own longer necklaces or statement chains that need room to lie flat.
The cheapest gear on this list does the most work: museum wax to hold pieces still, a lint-free microfiber cloth, and a rocket-style lens blower for dust. None of these cost more than a few dollars, and skipping them is the fastest way to end up reshooting.
How do you light gold jewelry without harsh reflections?
Gold reflects its surroundings the way a mirror does, so the goal isn’t more light. It’s controlling what the metal reflects. Professional jewelry photographers place large white or neutral cards just outside the frame so the gold picks up soft, even reflections instead of a harsh point of light or a distracting hot spot.
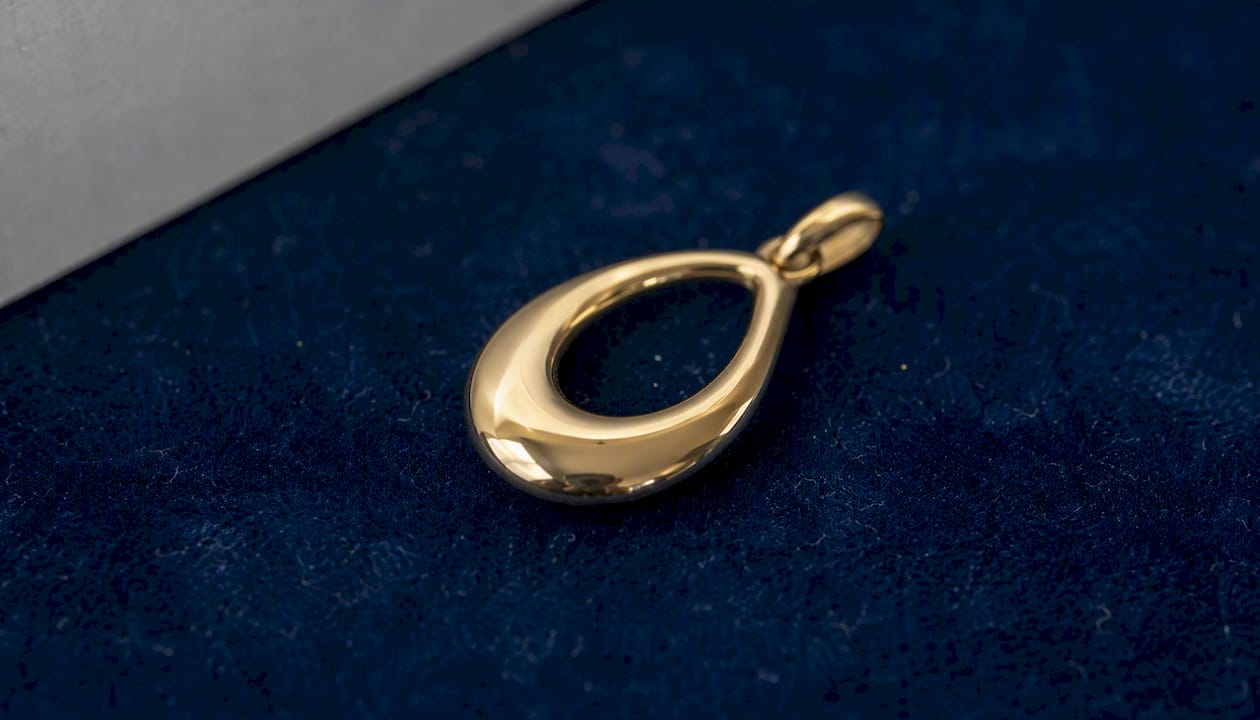
CRI, or Color Rendering Index, measures how accurately a light source reveals true color compared to natural daylight. For gold, this isn’t a minor spec. Lights rated below CRI 95 can shift warm gold tones toward muddy yellow, green, or orange, and that shift is hard to fully correct after the fact, even shooting RAW. If you’re documenting a piece for insurance or provenance, an inaccurate color record defeats the purpose of the photo.
Two setups cover almost every situation a home collector faces:
- North-facing window plus white foam board. Position the piece near indirect window light, then use a white foam board on the opposite side as a bounce card. This two-source setup removes harsh shadows while keeping color accurate, and it costs nothing beyond the board itself.
- Small light box with supplemental LED panels. For consistent results regardless of weather or time of day, a light box diffuses your light source evenly on all sides, which is why it’s considered one of the highest-value purchases for a home setup.
Pro Tip: Cut a small hole in a white card and shoot your lens through it. This puts a soft white reflection on the gold’s surface instead of the dark silhouette of your camera and lens, which is one of the most common reflections collectors accidentally capture in polished metal.
Arrange your reflectors so light wraps around curves rather than hitting the piece head-on. A single strong light straight at a ring band creates one blinding hot spot and leaves the rest of the piece flat and dark by comparison.
What camera settings work best for gold jewelry close-ups?
For sharp, low-noise macro shots, set your aperture between f/8 and f/16, keep ISO at 100 to 200, and mount your camera on a tripod so you can use slower shutter speeds, a shutter speed range to avoid motion blur when shooting on a tripod, without introducing camera shake. Shoot RAW whenever your camera supports it. RAW files retain more color and exposure data, which matters when you’re correcting for warm gold tones later.
If you’re using a smartphone, switch to the built-in macro mode or add a compatible macro lens attachment, and make sure you’re using the primary lens, not the ultrawide, which distorts close-up proportions. Lock your autoexposure and autofocus once you’ve framed the shot (tap and hold on most phones), turn off HDR, since it tends to flatten metallic detail, and shoot in ProRAW or RAW format if your device offers it.
For focus, a tripod is non-negotiable at macro distances, where even slight hand movement blurs fine detail like hallmark stamps. Advanced collectors sometimes use focus stacking, combining multiple shots at different focus points, to get an entire ring in sharp focus from front to back, but this is optional and adds real time to your workflow. A basic remote shutter or a 2-second timer eliminates the shake caused by pressing the shutter button by hand.
One setting adjustment worth knowing: slightly underexpose your shot, maybe a third to half a stop, to protect the brightest highlights on polished gold. It’s easier to recover shadow detail in editing than to bring back a blown-out highlight that’s lost all texture.
How do you document hallmarks and pieces for insurance records?
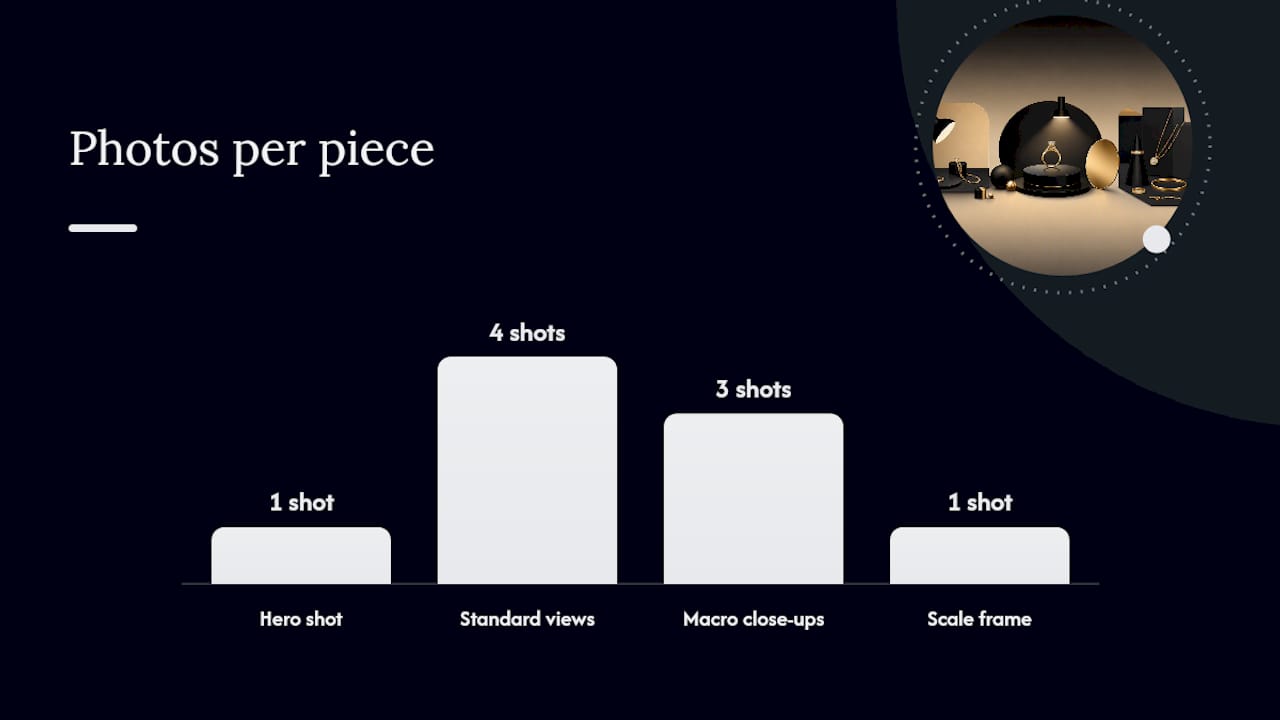
Insurance adjusters and appraisers expect a specific, repeatable set of images, not just a pretty hero shot. The standard checklist includes full views from the front, back, and both sides, a top-down shot, close-ups of any hallmarks or karat stamps (10K, 14K, 18K), the clasp or closure mechanism, and clear images of any existing damage. Include a coin or ruler in at least one frame so scale is unambiguous.
Photographing a hallmark takes patience. These stamps are often just a few millimeters wide, so you need your macro lens or phone macro mode close enough that the engraving reads clearly at full zoom. Steady the piece with museum wax on a flat surface, and use tweezers rather than your fingers to reposition delicate clasps or chain links, both to avoid smudging the metal and to avoid bending anything fragile.
A practical shot order for each piece:
- Hero shot, front, on your clean background.
- Back view.
- Both side profiles.
- Top-down view (for necklaces and bracelets, lay flat).
- Close-up of hallmark or karat stamp.
- Close-up of clasp or closure.
- Any damage, chips, or wear, photographed close.
- One frame including a scale reference.
Once you’re photographing, don’t skip the metadata. For each piece, record the maker if known, the karat, the date photographed, condition notes, and any serial numbers or inscriptions, then save this alongside your files. Keep original RAW files untouched, and back them up in at least two places. Pairing this photography routine with a structured cataloging system turns a folder of images into an actual inventory you can hand to an insurer or appraiser without scrambling.
Choosing backgrounds and composition that flatter gold
A white sweep or infinity curve, a background that curves seamlessly from horizontal to vertical with no visible seam, is the standard for documentation and insurance photos because it eliminates distracting horizon lines and keeps focus entirely on the piece. For social sharing, a textured surface like linen, wood, or a styled flat lay can look more compelling, but matte finishes matter regardless of which background you choose. Glossy props and shiny surfaces bounce secondary reflections back into the gold, muddying the very detail you’re trying to capture.
For composition, shoot rings at a slight elevation of roughly 15 to 20 degrees rather than flat, which gives the band dimensionality instead of a flat oval. Three-quarter angles generally show more depth and craftsmanship than a straight-on shot, especially on pieces with texture like Byzantine or rope chains. Leave generous negative space around the piece. Cramming a chain into the frame edge-to-edge makes it harder to appreciate the linkwork that makes fine gold jewelry distinctive.
If you want your images to double as both documentation and shareable content, shoot the required insurance angles first on your neutral background, then restyle the same piece on a textured surface for social posts. You get the record you need without compromising it for the sake of a prettier photo.
Editing gold jewelry photos without losing accuracy
Once you’ve shot RAW files with a gray card reference, correction is quick. Set a custom white balance using your 18% gray card, or correct white balance in post using that same reference frame, so your gold tones stay consistent from piece to piece rather than shifting warm or cool between shooting sessions.
For records and insurance purposes, keep your edits minimal. Adjust exposure and white balance, remove obvious dust specks, and stop there. Boosting saturation to make gold “pop” might look nice on Instagram, but it misrepresents the actual color of the metal, which defeats the purpose of a documentation photo. Save the heavier editing for images you’re posting purely for enjoyment, not for your permanent records.
Export two versions of every photo: a high-resolution TIFF or PNG for your archive, and a compressed JPEG for sharing or emailing to an appraiser. Name files consistently, something like piece-name_karat_date.tif, and embed metadata directly into the file where your software allows it. Back up originals in two places, a local external drive and a cloud service, and keep scanned appraisal documents and receipts filed alongside the corresponding image files, not scattered across different folders.
| Backup element | Where it lives |
|---|---|
| Original RAW files | Local drive (primary) |
| Archive TIFF/PNG | Cloud backup |
| Shareable JPEG | Cloud or device storage |
| Appraisal/receipt scans | Same folder as matching images |
Fixing the most common gold photography mistakes
Blown-out highlights are the most frequent problem collectors run into, usually caused by a bulb pointed directly at the piece instead of bounced off a diffuser. Move your light source farther away or add another layer of diffusion, and dial in that slight underexposure mentioned earlier.
A green or muddy color cast almost always traces back to a low-CRI light source. If your images look consistently off no matter how you adjust white balance, the fix isn’t more editing. It’s swapping to a CRI 95+ LED or leaning harder on gray-card white balance correction. Camera or lens reflections showing up as a dark shape in a polished surface get solved by shooting through a white card with a small lens hole cut into it, which fills that reflection with soft white instead of your equipment’s silhouette.
Motion blur from handheld macro shots and visible dust or fingerprints at 100% zoom both come down to the same fix: a tripod and remote shutter eliminate camera shake, and a lint-free cloth with canned air handles debris before you ever press the shutter.
Pro Tip: If a hallmark is unreadable or your reflection pattern looks wrong in review, reshoot that frame immediately rather than trying to fix it later. A stray dust speck is a quick edit; an unreadable karat stamp on your only insurance photo is not fixable at all.
A one-hour workflow for photographing a small gold collection
You can photograph one piece properly in under 20 minutes, and a small batch of five or six pieces in about an hour, if you keep your setup locked between items.
- Prep and cleaning (5 to 7 minutes). Wipe down each piece, remove dust with canned air, and secure any loose components with museum wax.
- Set lights, background, and gray card (5 to 7 minutes). Build your setup once and don’t rebuild it between pieces unless the size changes dramatically.
- Shoot required shots per piece (5 to 8 minutes each). Work through your shot list in order: hero, hallmark, scale reference, then the remaining angles.
- Relabel and back up RAW files (3 to 5 minutes). Rename files consistently and copy them to a second storage location before moving to the next piece.
Keep your camera settings, light position, and background completely fixed between pieces of similar size. Small adjustments are fine for a chunky bracelet versus a delicate stud earring, but rebuilding the whole setup each time is where an hour turns into an afternoon.
If something interrupts your session, shoot your priority images first: hero shot, hallmark close-up, and scale reference. Those three cover the minimum an insurer or appraiser needs, so even an incomplete session leaves you with usable documentation.
Why accurate photos matter more than collectors realize
Every piece in a collection has a story written into its hallmark, its wear pattern, its clasp. A photo that gets the color and the stamp right isn’t just a nice picture. It’s the record that proves what you own when a claim, a repair, or a resale conversation actually happens.
At Bakergoldchains, we build every piece from 10K, 14K, or 18K gold sourced from reputable U.S. suppliers, backed by a lifetime craftsmanship guarantee and transparent metal certification. That transparency only holds up over time if you keep good records on your end too. Store your appraisals, receipts, and photographs together, not in three different places, so that if you ever need to prove provenance or file a claim, everything is one search away instead of a scramble.
What most guides get wrong about photographing gold at home
Most photography advice online is written for sellers trying to move product, not for someone who already owns the piece and just wants an accurate, lasting record of it. That distinction changes almost every decision you make. A seller optimizes for the shot that sells fastest. A collector should optimize for the shot that still tells the truth about the piece in ten years.
That means resisting the urge to oversaturate colors or lean on flattering-but-inaccurate lighting tricks meant to make gold “pop” for a listing photo. It also means the conventional wisdom about needing a full studio setup is overstated.
If there’s one place collectors should start, it’s not the camera. It’s the light. Get a CRI 95+ source and a gray card sorted before you spend another dollar on lenses or backgrounds, because no amount of post-processing fully rescues a photo shot under bad light.
Keep your photos and your collection records in one place
Beyond photography, keeping your gold organized means having somewhere to reference karat, provenance, and craftsmanship details when you’re adding new pieces or replacing something you’ve had photographed for years. Bakergoldchains’s catalog gives you that reference point, with transparent certification on every piece so what you photograph today matches what’s documented at purchase.
If a photo session reveals a piece that’s damaged beyond a simple repair, or you’re looking to round out a collection with something that matches your existing pieces in karat and finish, browse the graduated bead necklace in 14K yellow gold or the woven rope bracelet with diamond accents in 14K rose gold. Every purchase comes with certification documentation ready to file alongside the photos you just took, so your records stay complete from day one.
Sources
- Jewelry product photography tips
- How to photograph jewelry at home: 15 DIY tips
- Jewelry insurance repair photo checklist for faster, stronger claims
- Bright ideas: Tips and techniques for photographing jewelry

